Set up Custom Domain
Map a custom domain to Azure Container App with automatic SSL/TLS certificate
Map a custom domain to your Azure Container App with automatic SSL/TLS certificate management.
Prerequisites
- An Azure Container App deployed and running
- A domain name you own
- Access to your domain's DNS management (Cloudflare in this example)
Steps
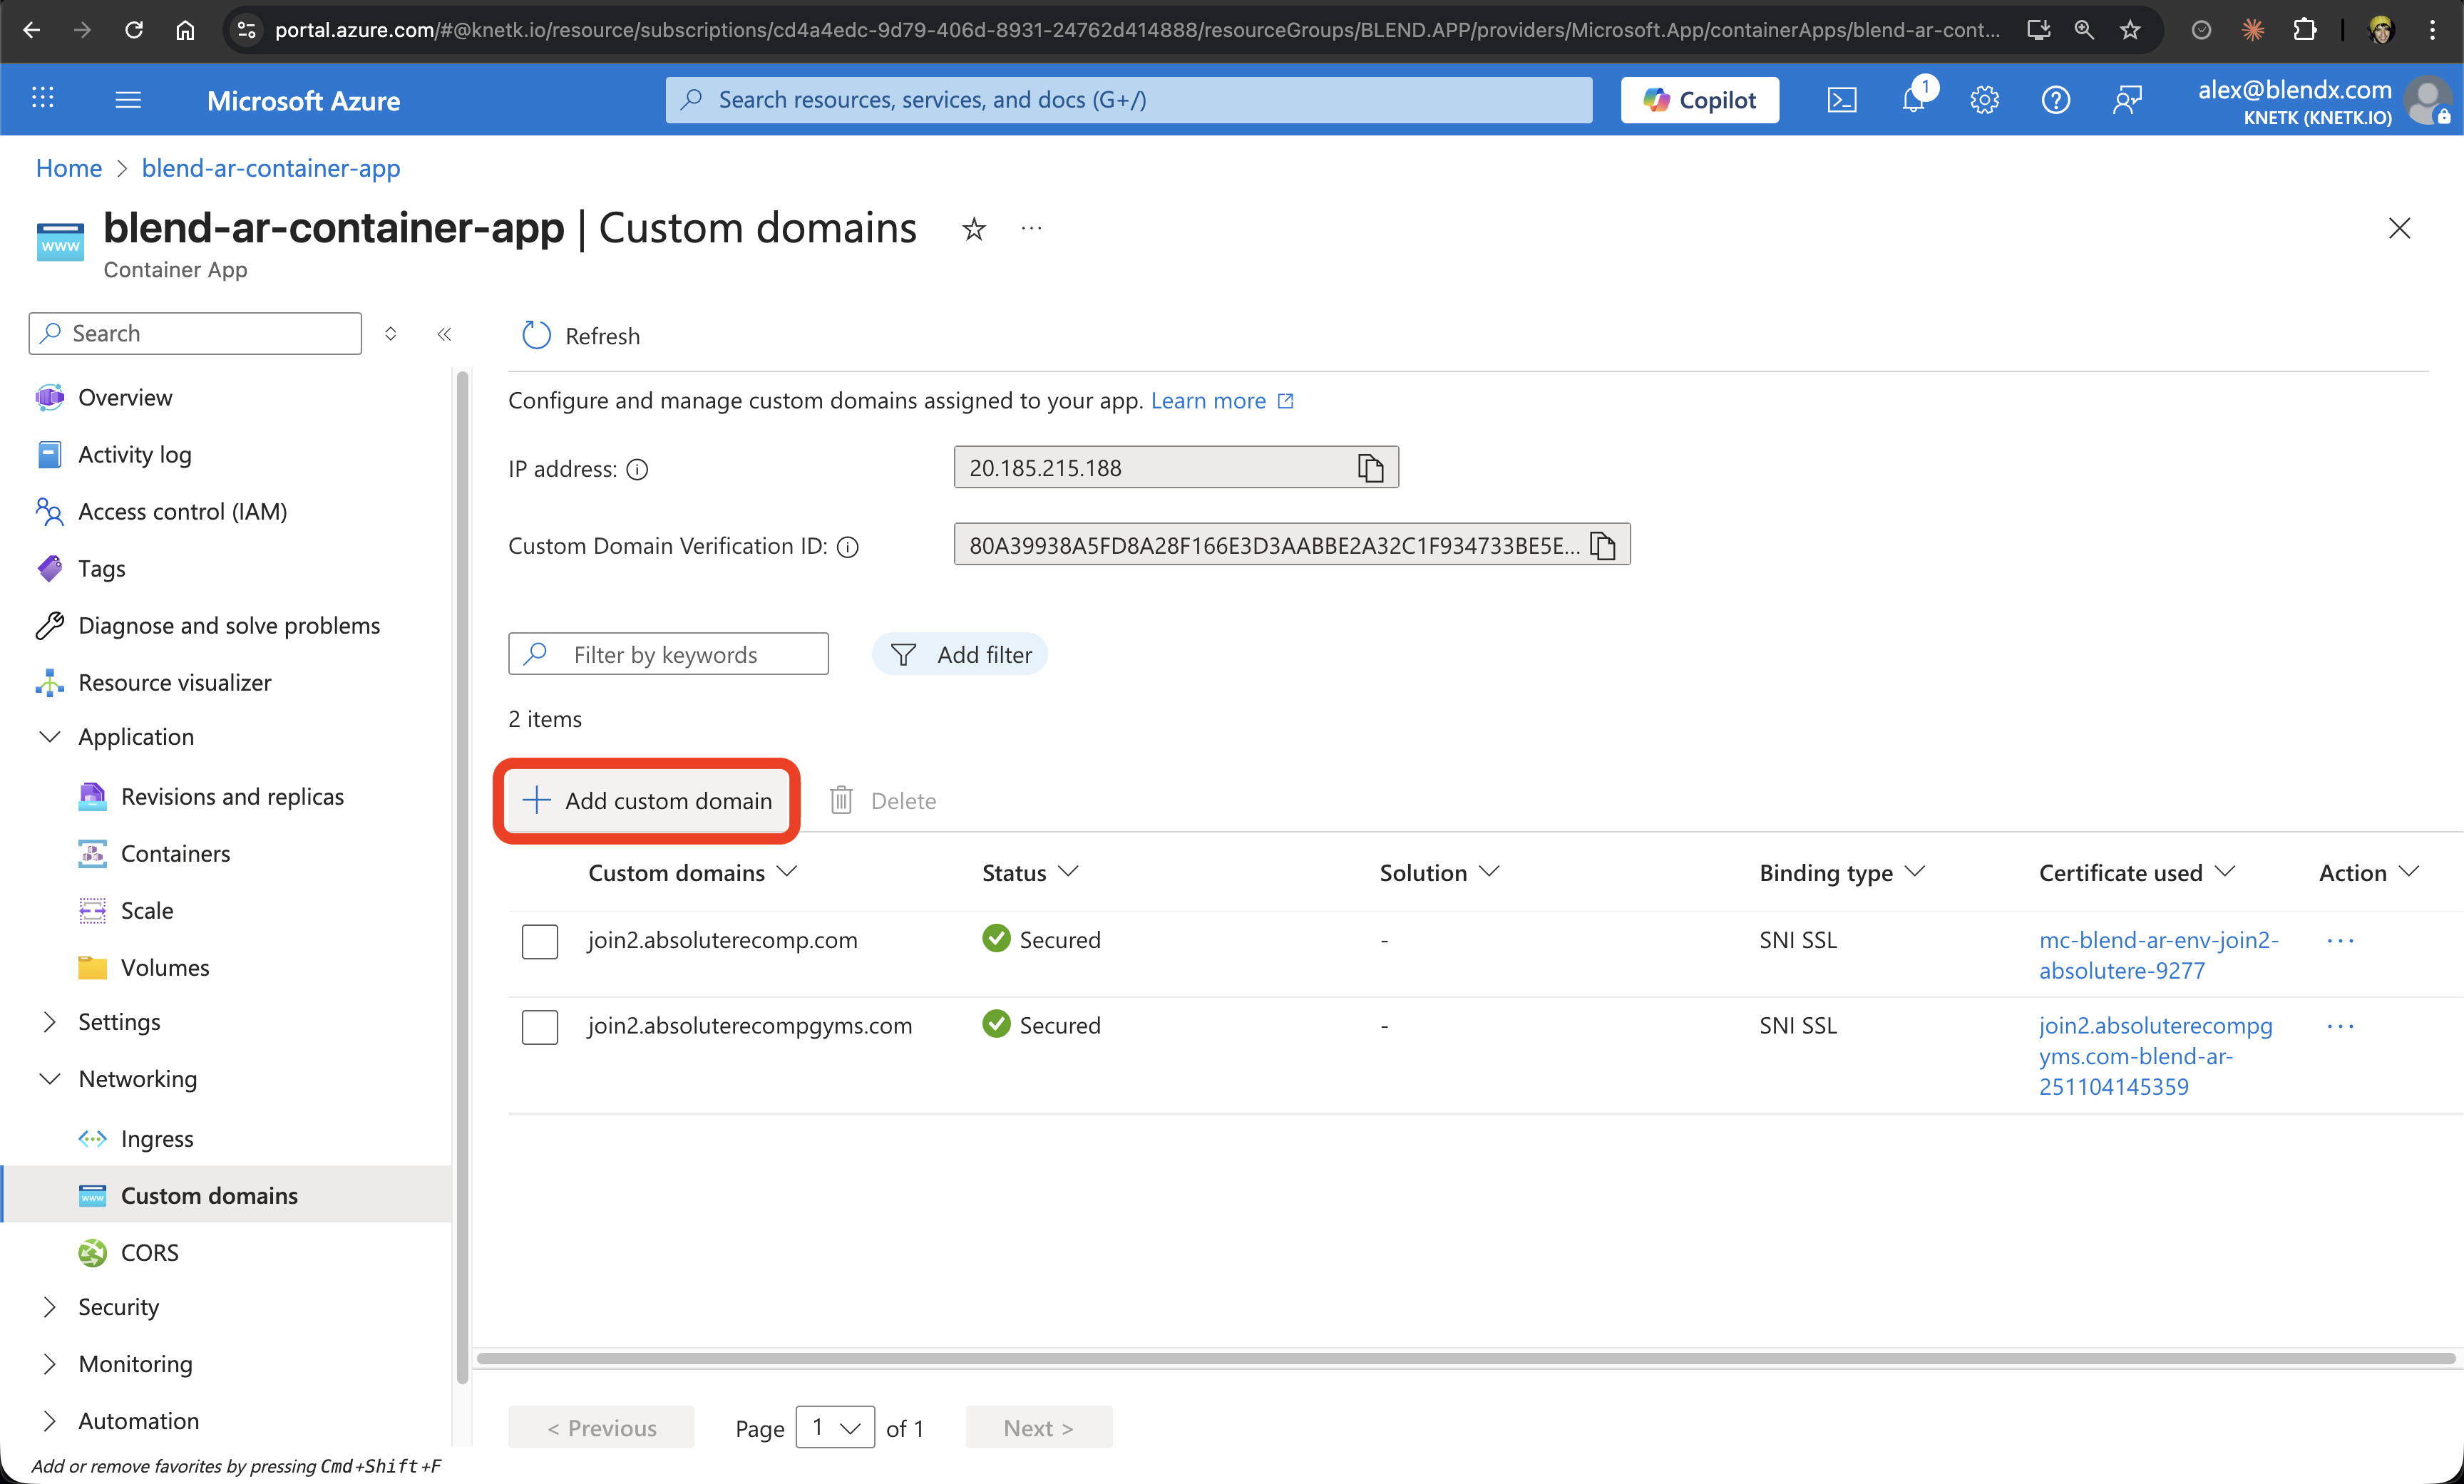
1. Navigate to Custom Domains
Go to your Container App in Azure Portal and click on Custom domains in the left sidebar. Click the "+ Add custom domain" button.
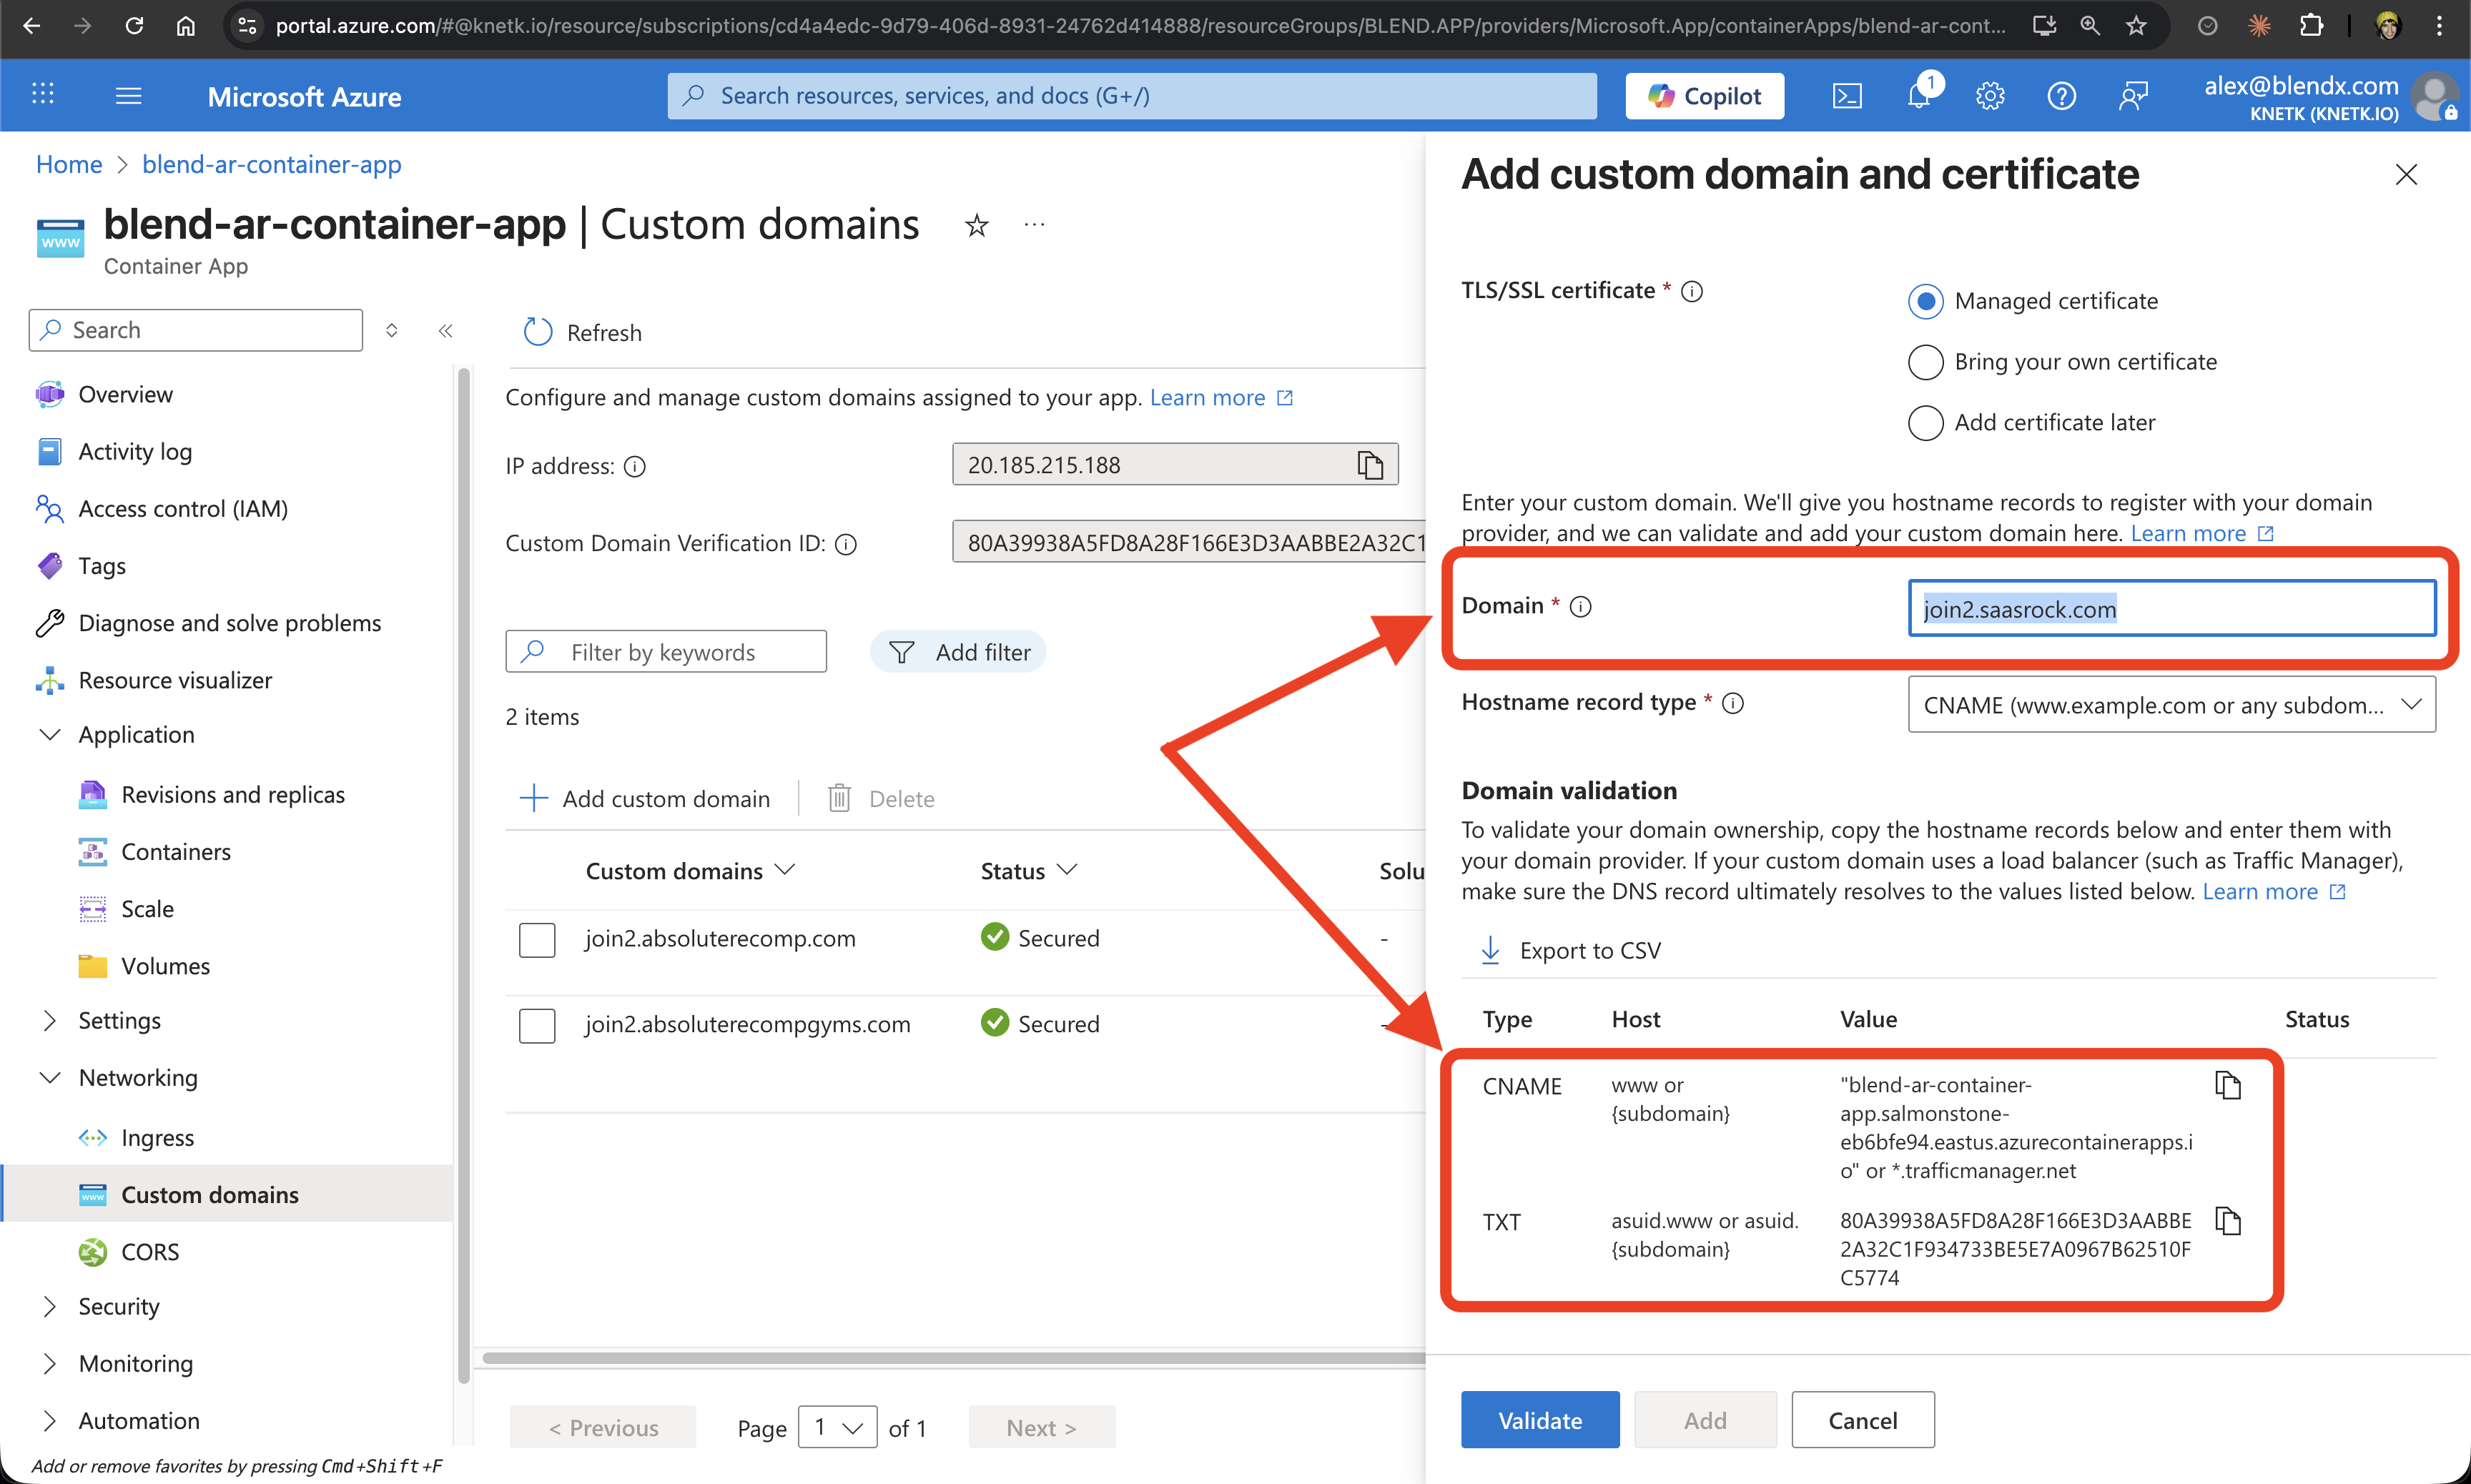
2. Configure Custom Domain
Enter your domain details:
- Domain: Enter your subdomain (e.g.,
join2.saasrock.com) - TLS/SSL certificate: Select "Managed certificate" for automatic SSL
- Azure will provide DNS records you need to configure
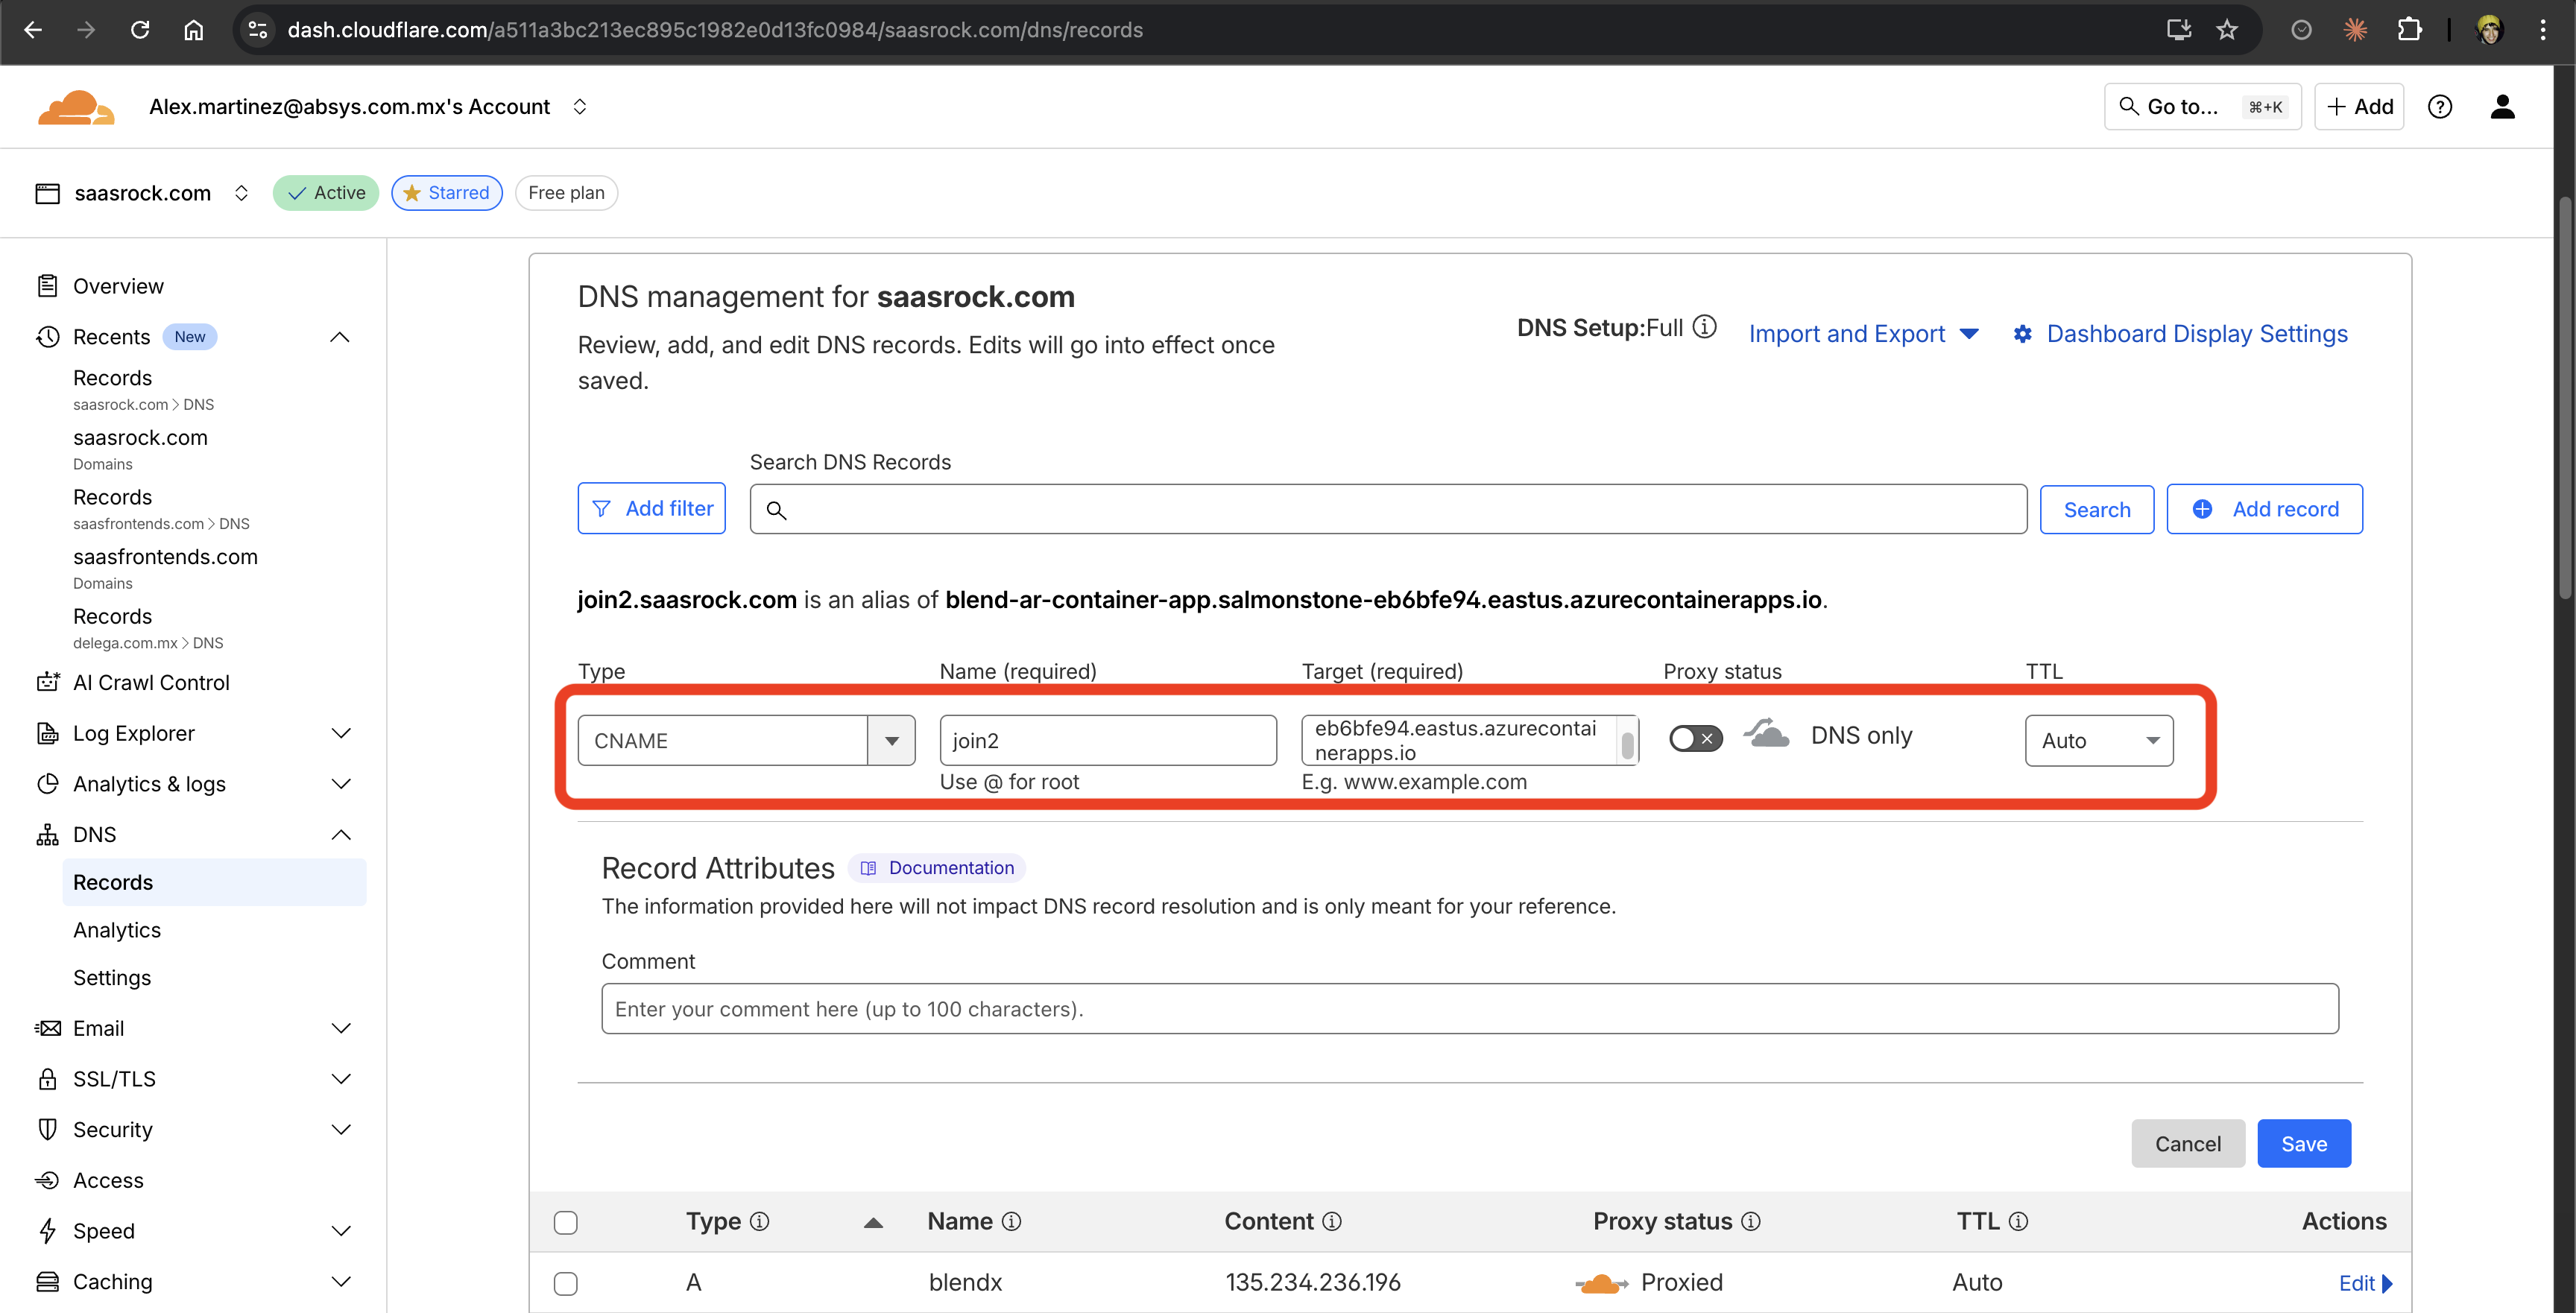
3. Add CNAME Record in Cloudflare
Log into Cloudflare and navigate to your domain's DNS settings. Add a CNAME record:
- Type: CNAME
- Name:
join2(your subdomain) - Target: Your container app URL (e.g.,
blend-ar-container-app.salmonstone-eb6bfe94.eastus.azurecontainerapps.io) - Proxy status: Set to DNS only (gray cloud)
4. Add TXT Record for Verification
Add the TXT verification record in Cloudflare:
- Type: TXT
- Name:
asuid.join2(asuid.yoursubdomain) - Content: The verification string provided by Azure
- Save the record

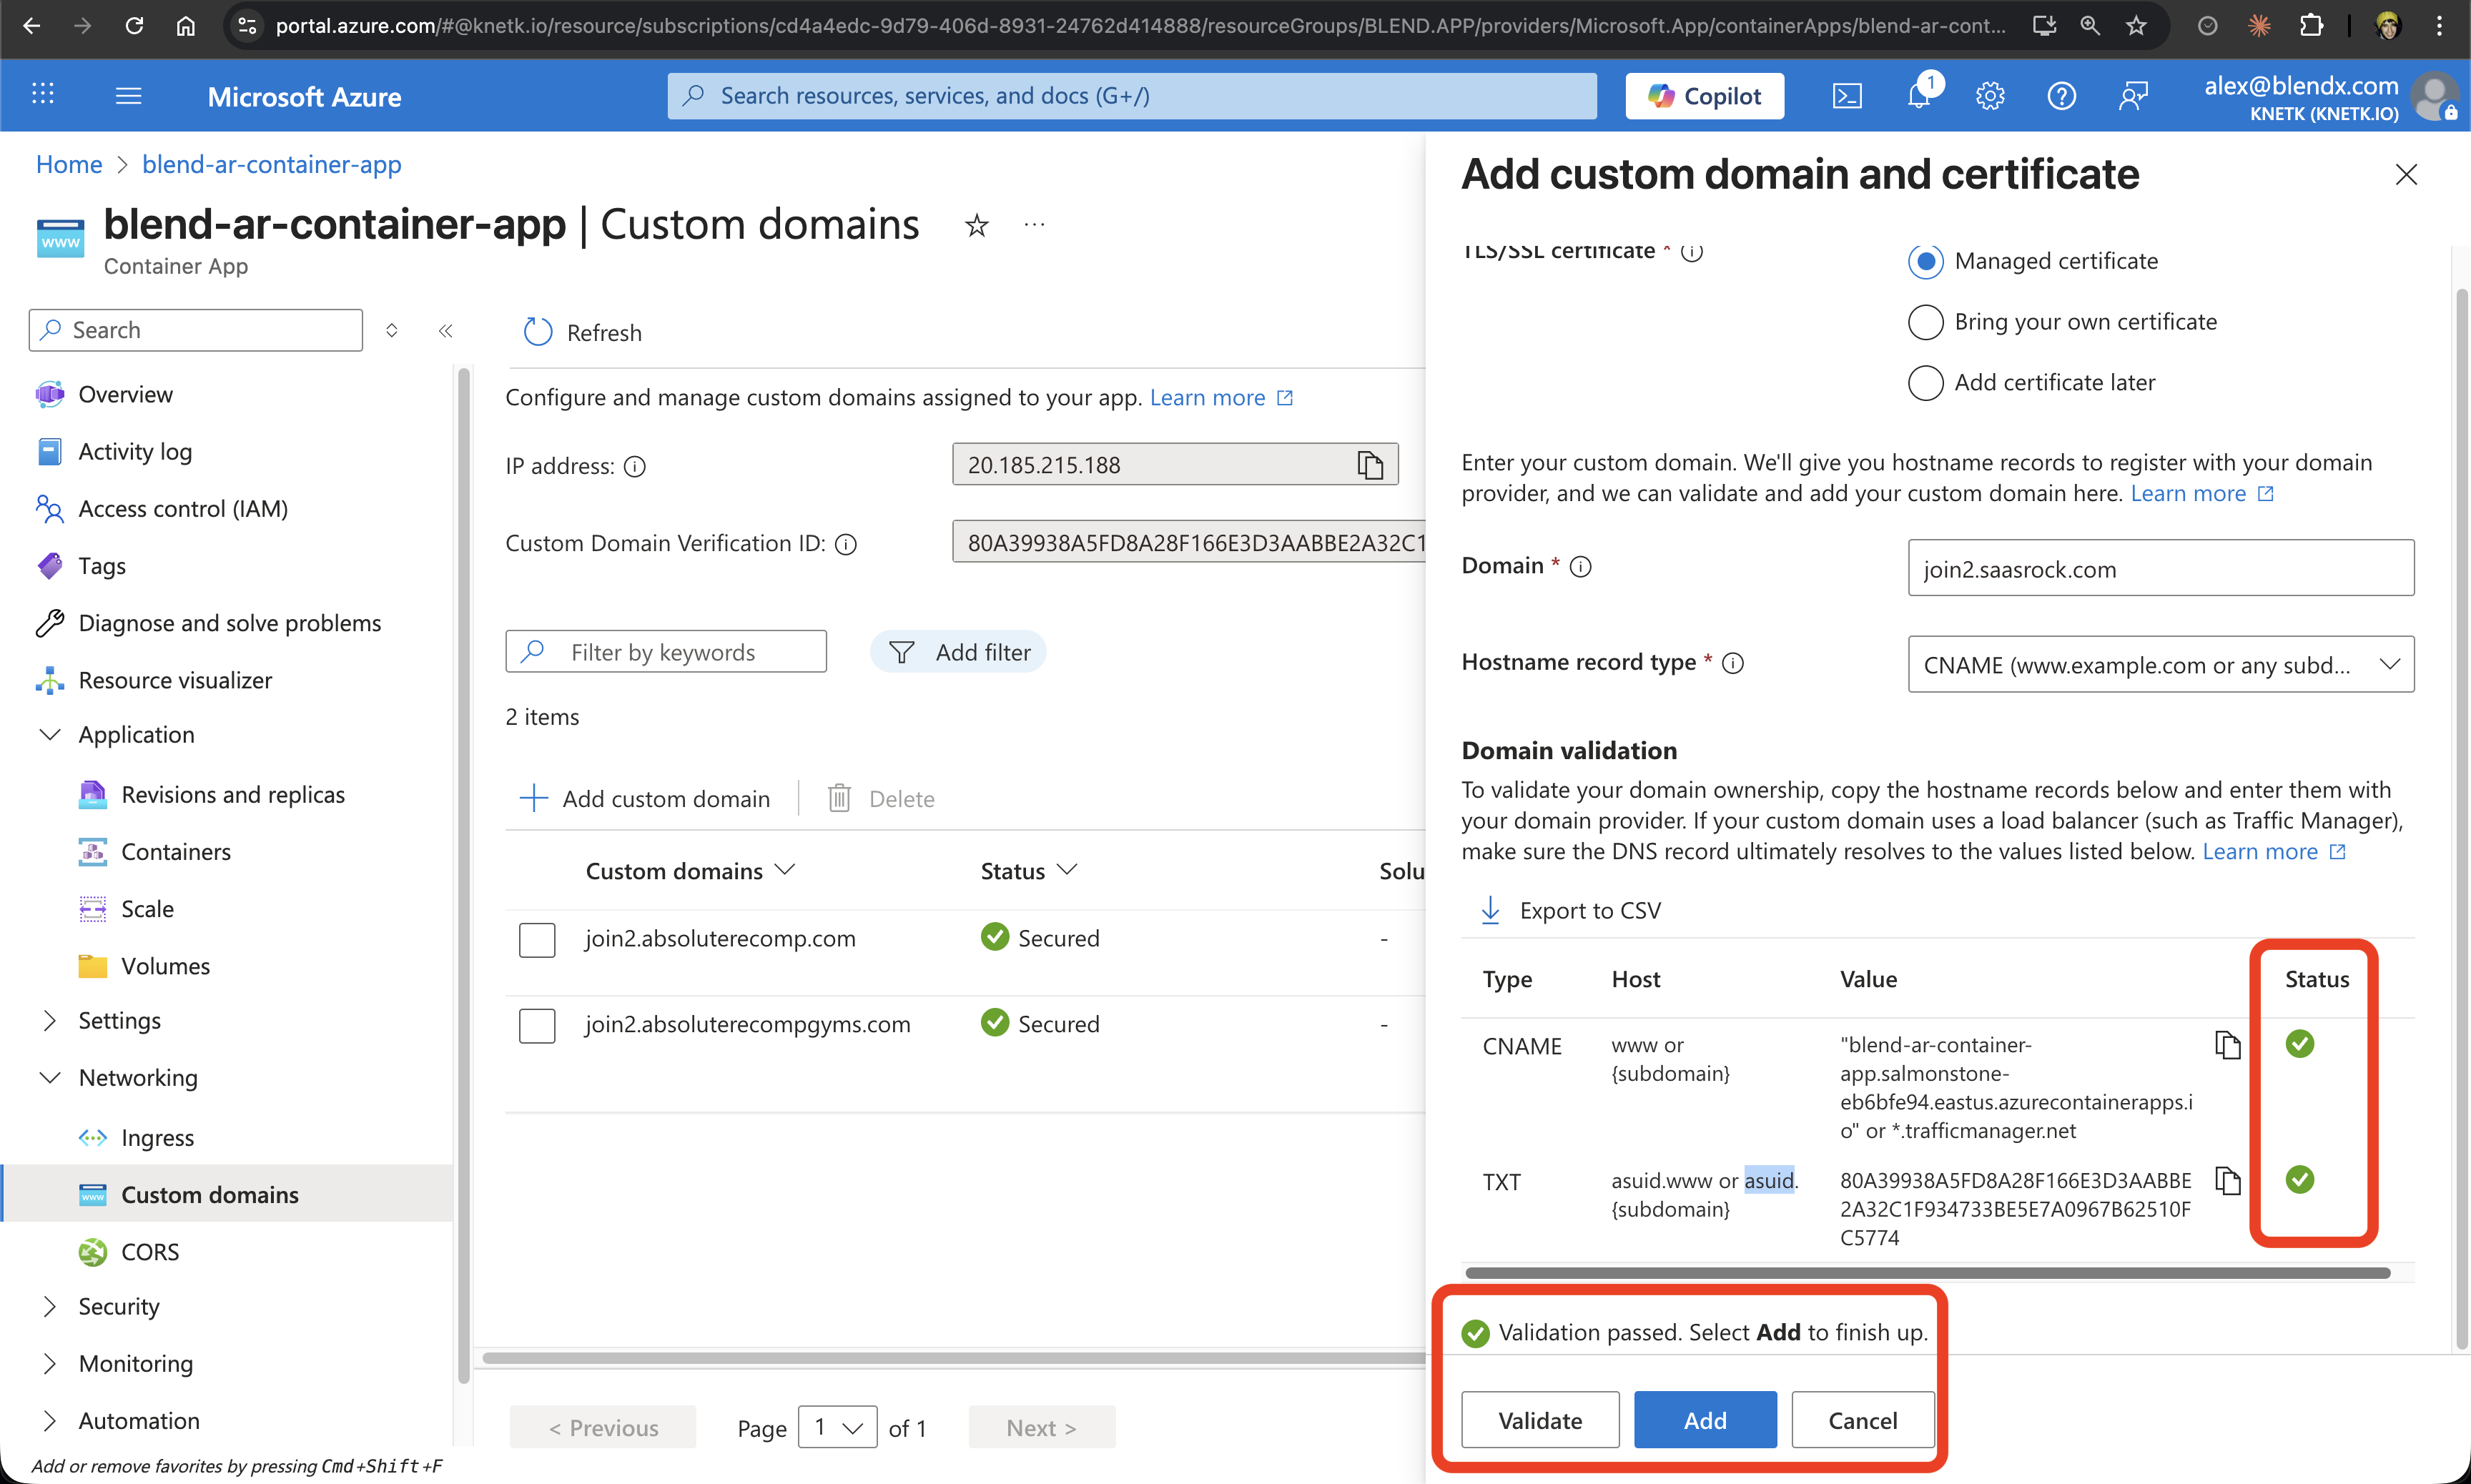
5. Verify DNS Records
Your Cloudflare DNS records should now show both the CNAME and TXT records configured correctly.

6. Validate Domain in Azure
Return to Azure Portal and click "Validate". Once both DNS records are detected (green checkmarks), click "Add".
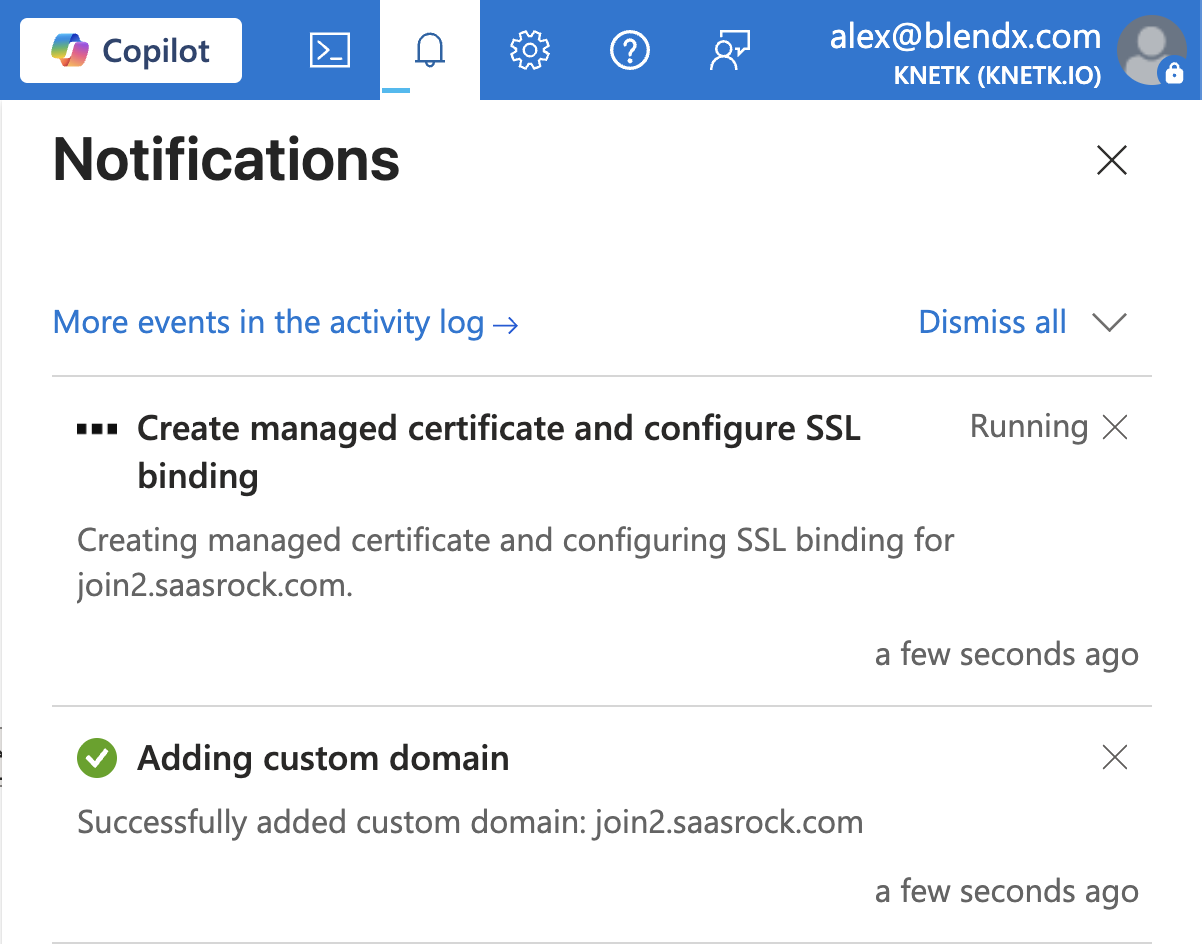
7. Wait for Certificate Provisioning
Azure will automatically provision a managed certificate. You'll see a notification that the certificate is being created.
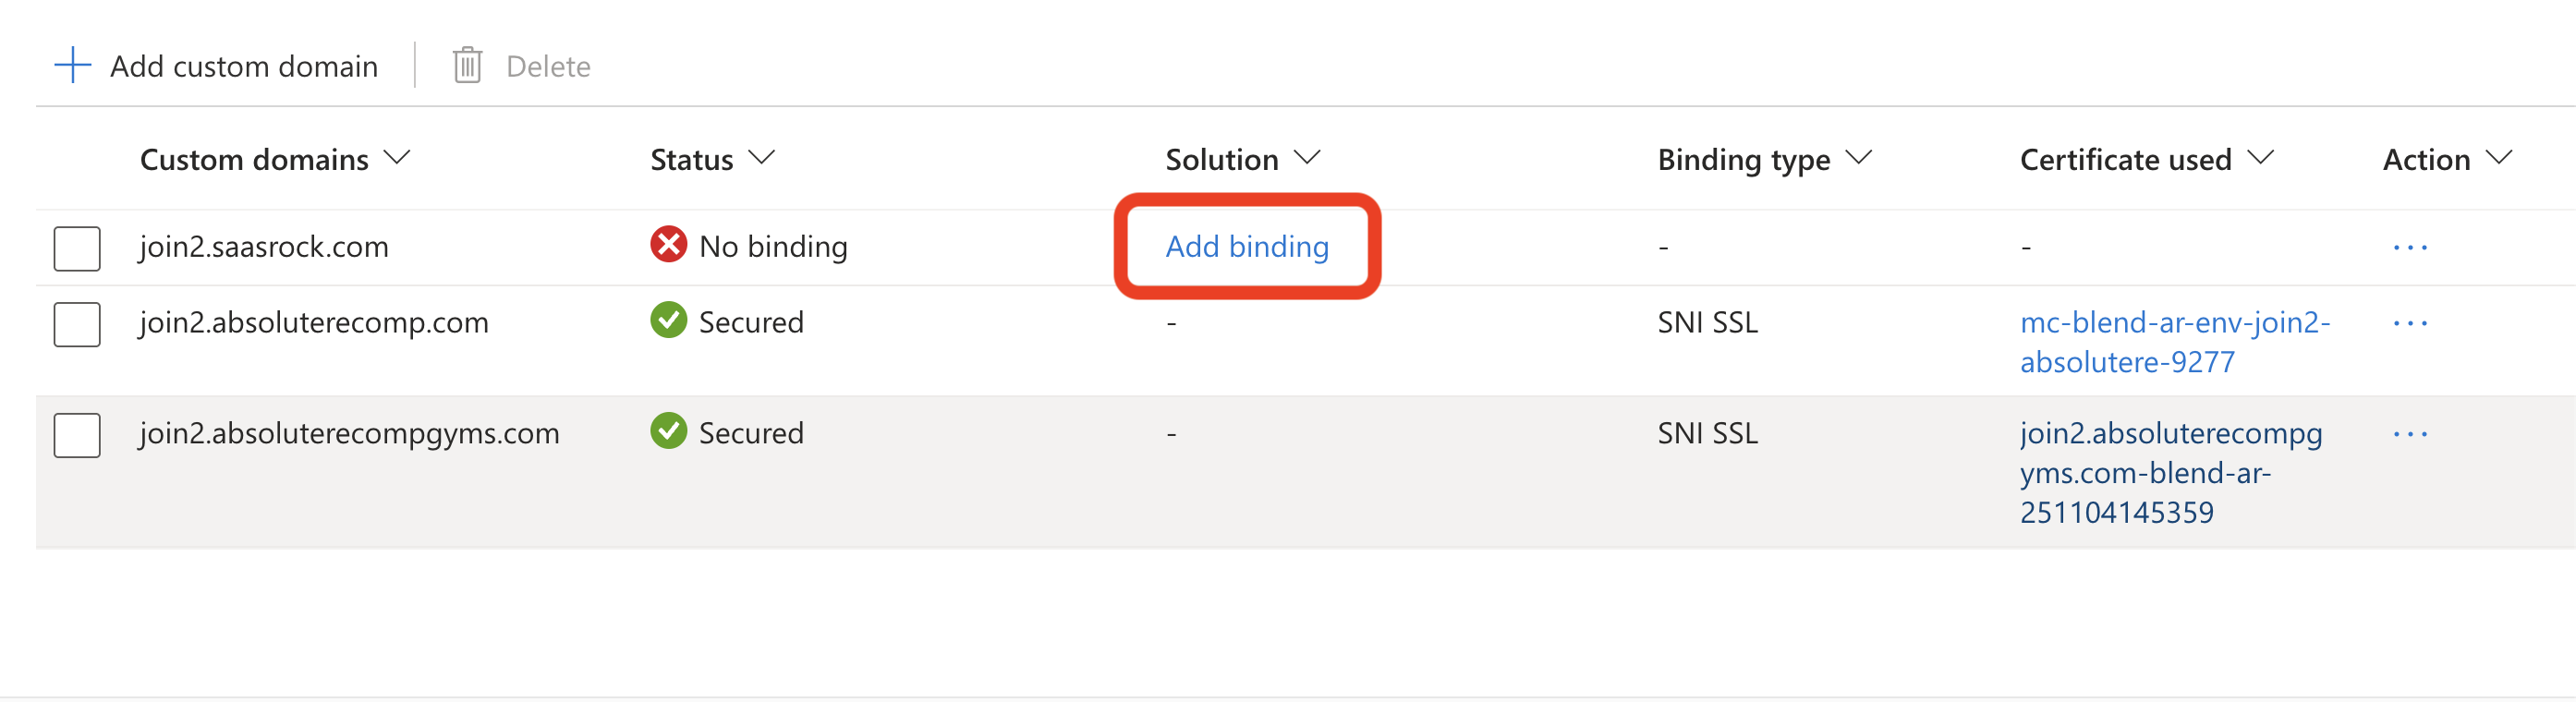
8. Add SSL/TLS Binding
Once the domain is added but shows "No binding", click "Add binding" to configure SSL.
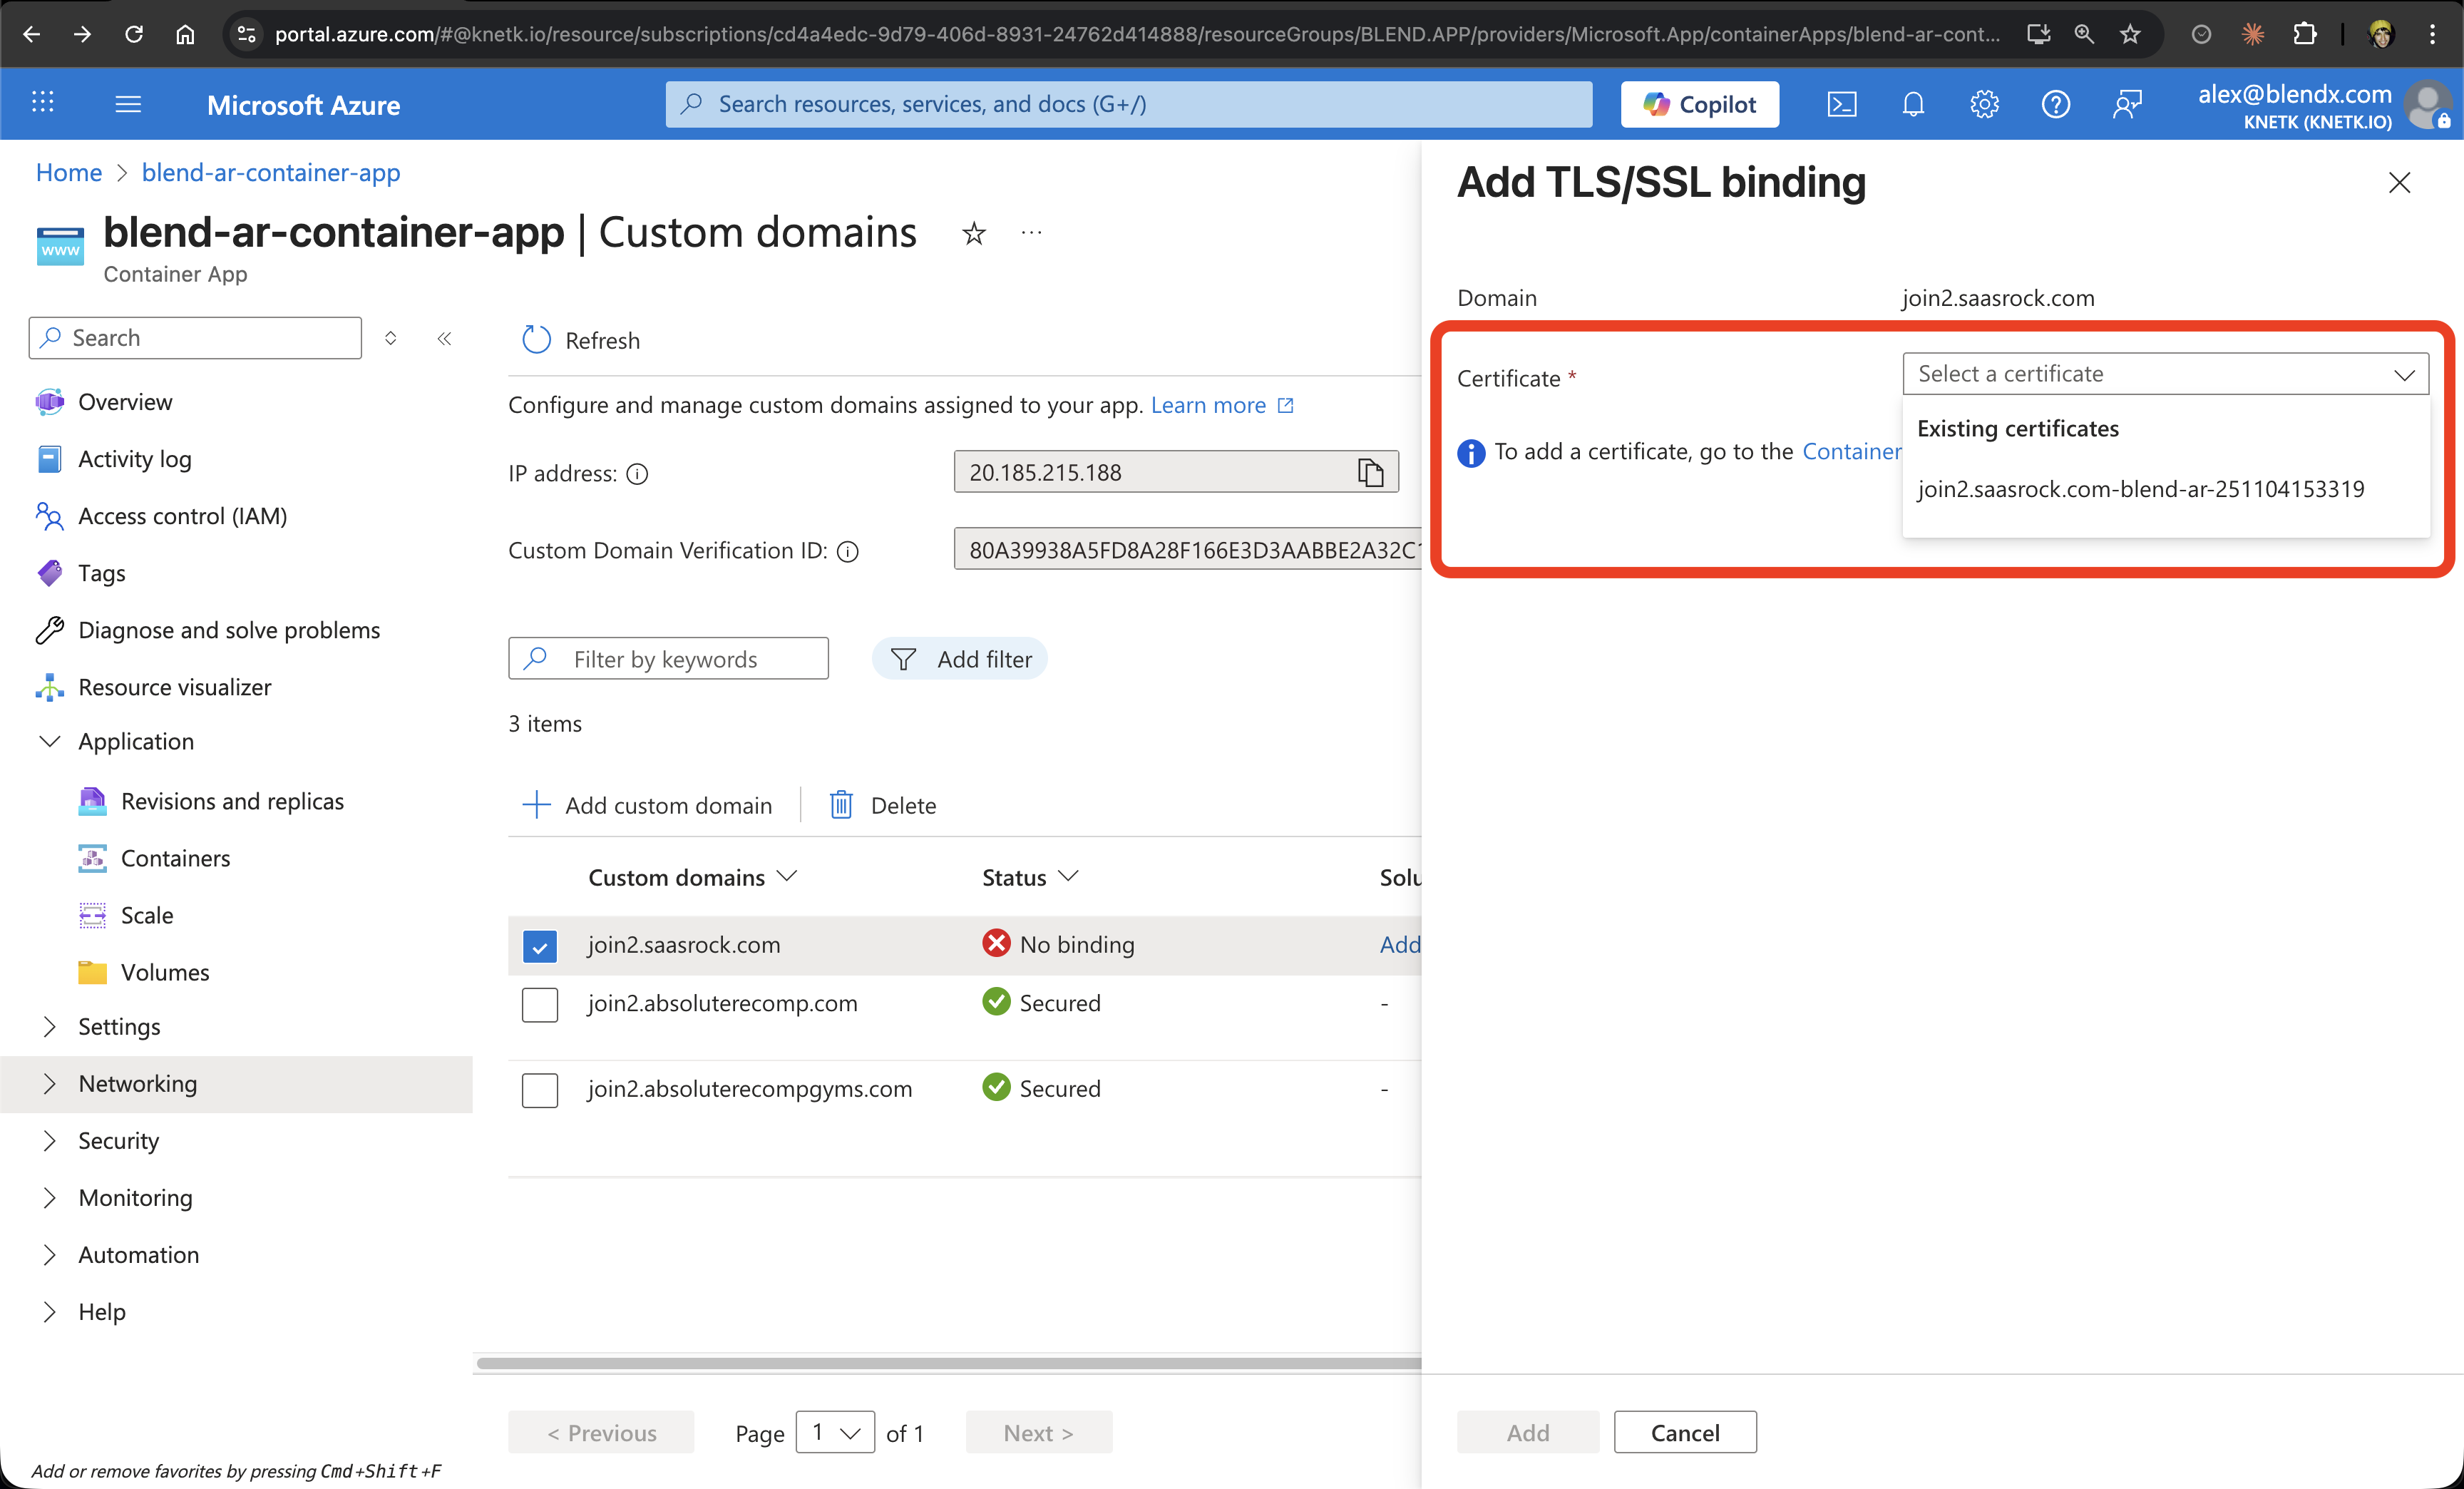
9. Select Certificate
In the binding configuration:
- The domain will be pre-selected
- Choose the certificate from the dropdown (it should show your managed certificate)
- Click "Add"
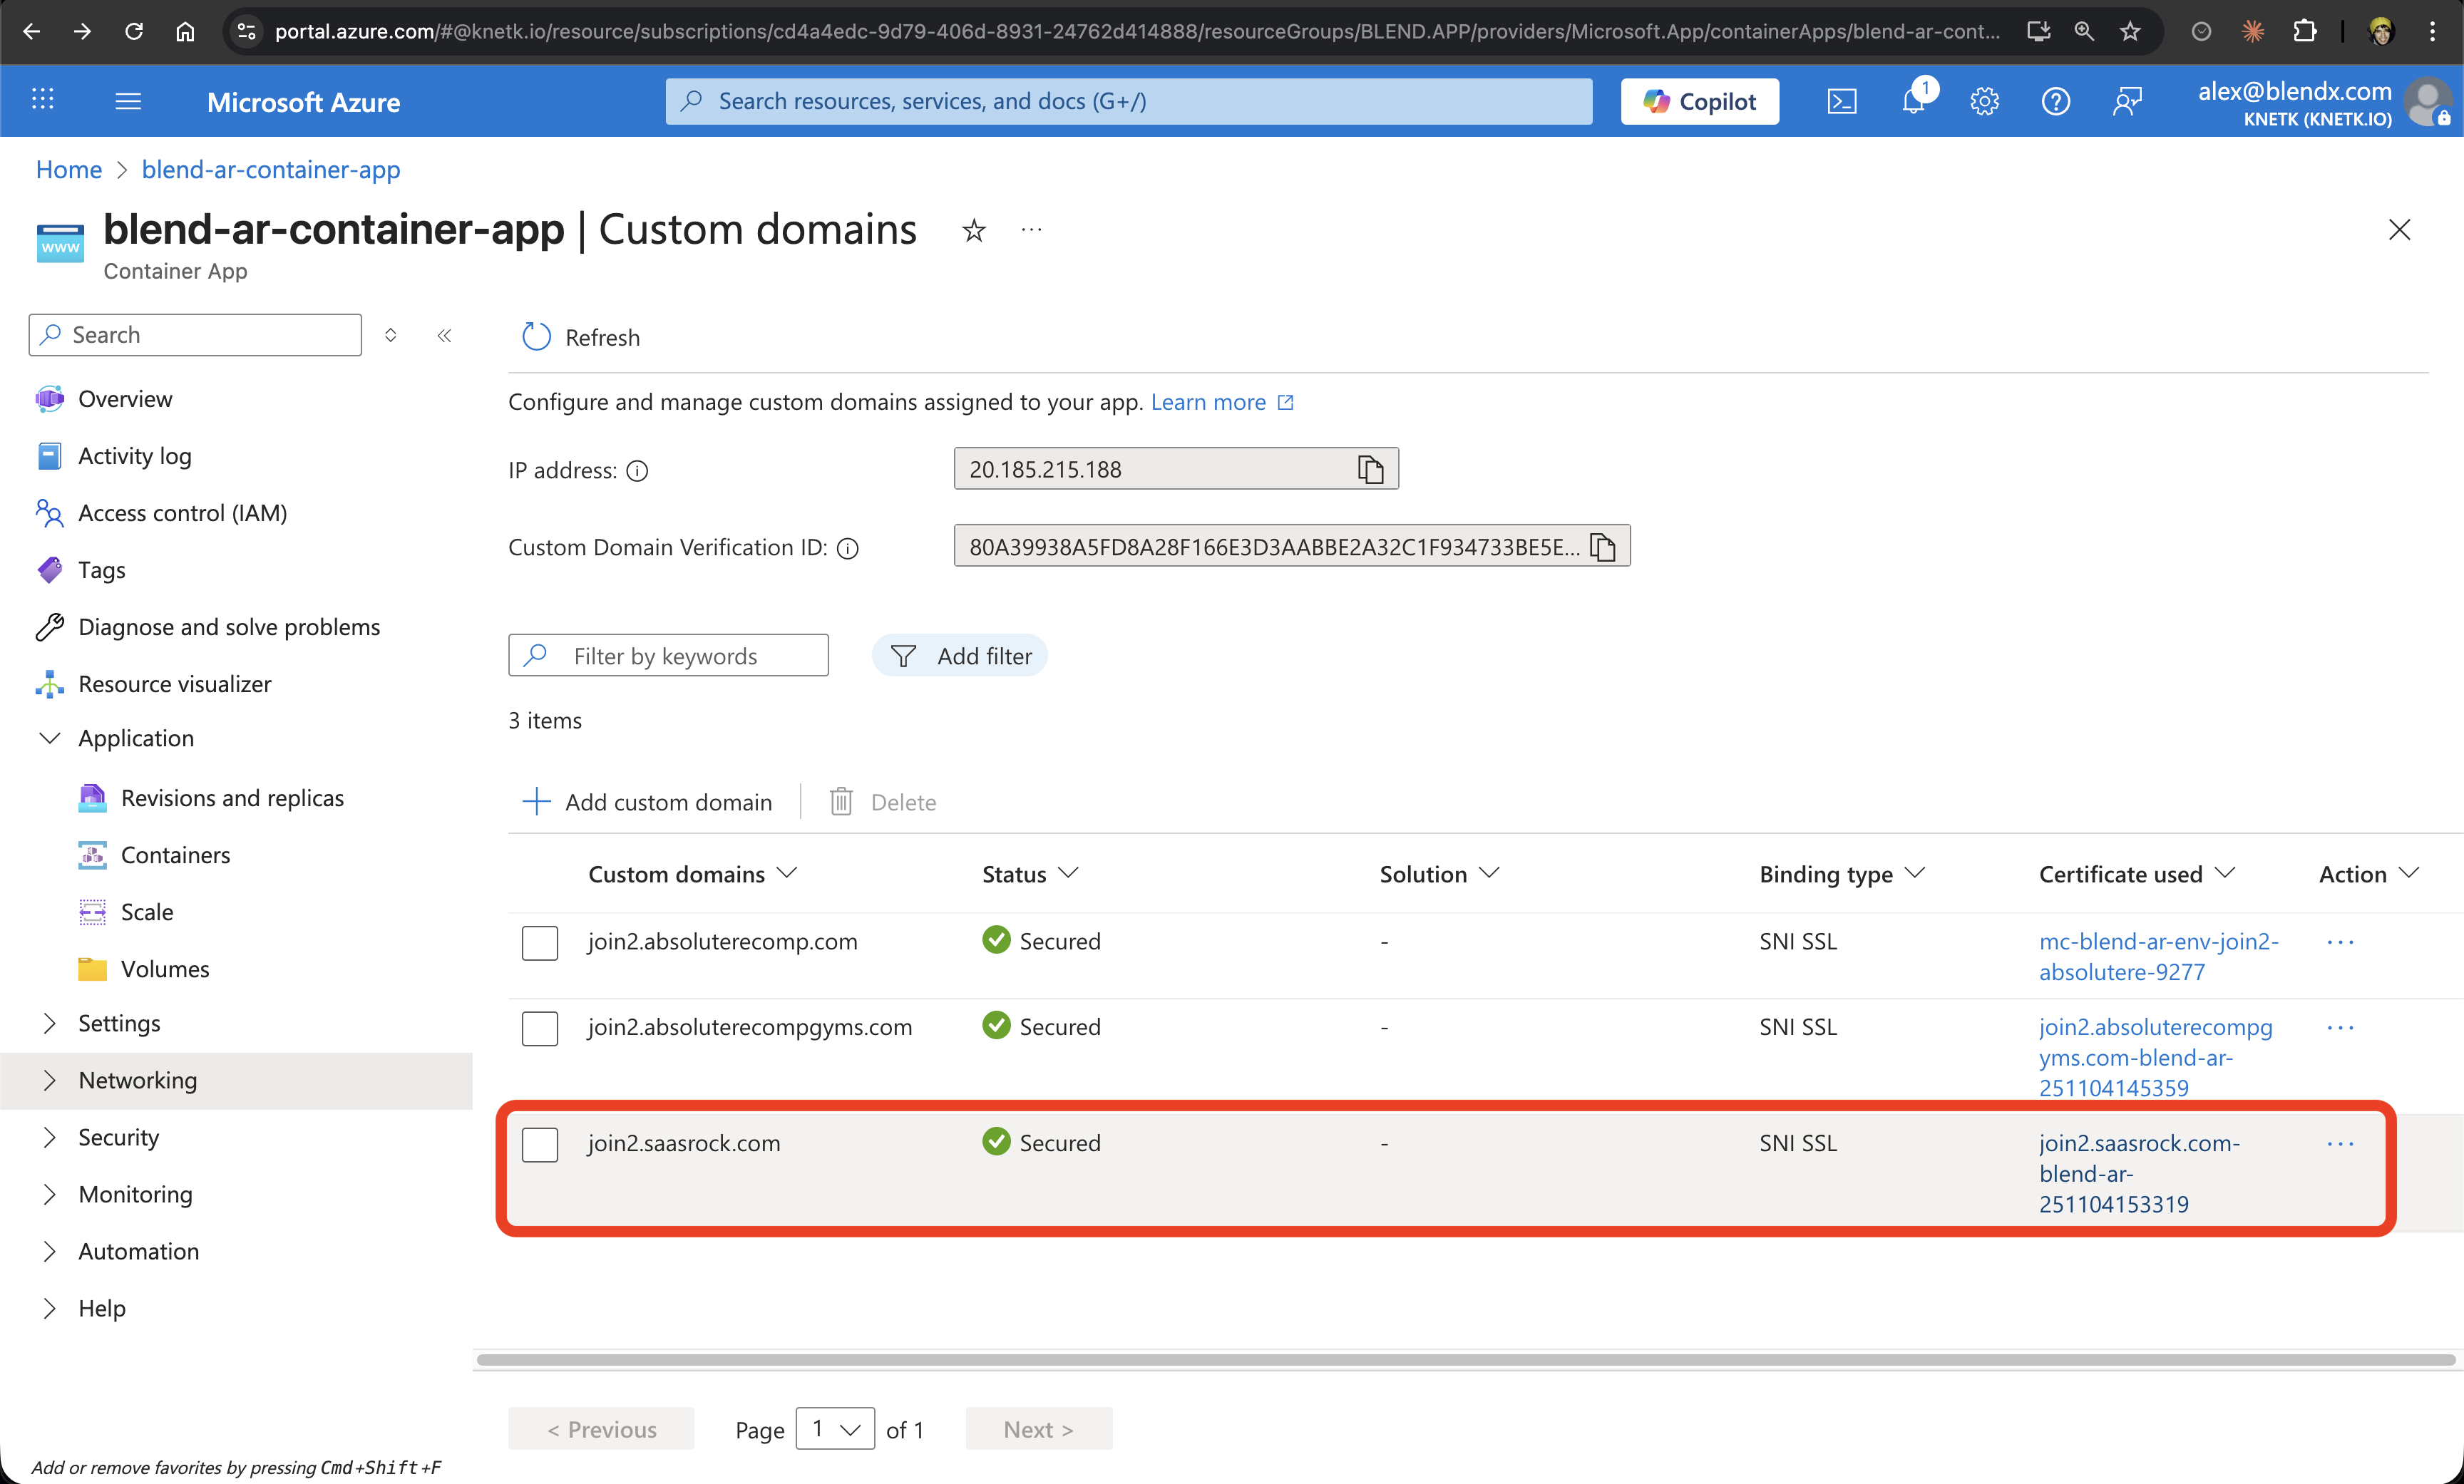
10. Verify Final Configuration
Your custom domain is now configured with:
- Status: Secured
- Binding type: SNI SSL
- Certificate: Managed certificate (auto-renewing)
Important Notes
- DNS Propagation: Changes can take up to 48 hours to propagate, but usually complete within minutes
- Cloudflare Proxy: Keep it disabled (DNS only) for Azure Container Apps to work properly
- Certificate Management: Azure automatically renews the managed certificate before expiration
- Multiple Domains: You can add multiple custom domains to the same container app
